Conversational Landing pages are mostly used with promotional campaigns where you click on a particular link and the CLP gets displayed on the new window but it is not just limited to that, you can use these CLP in your web pages as well. You can embed the CLP in the web page you desire and make sure the visitor chats with the bot.
A. Embed your bot to the website
Embedding your bot is a 5-step process. Have a look at the steps below:
1. Select the Dialogue from the list with which you want it to be embedded.
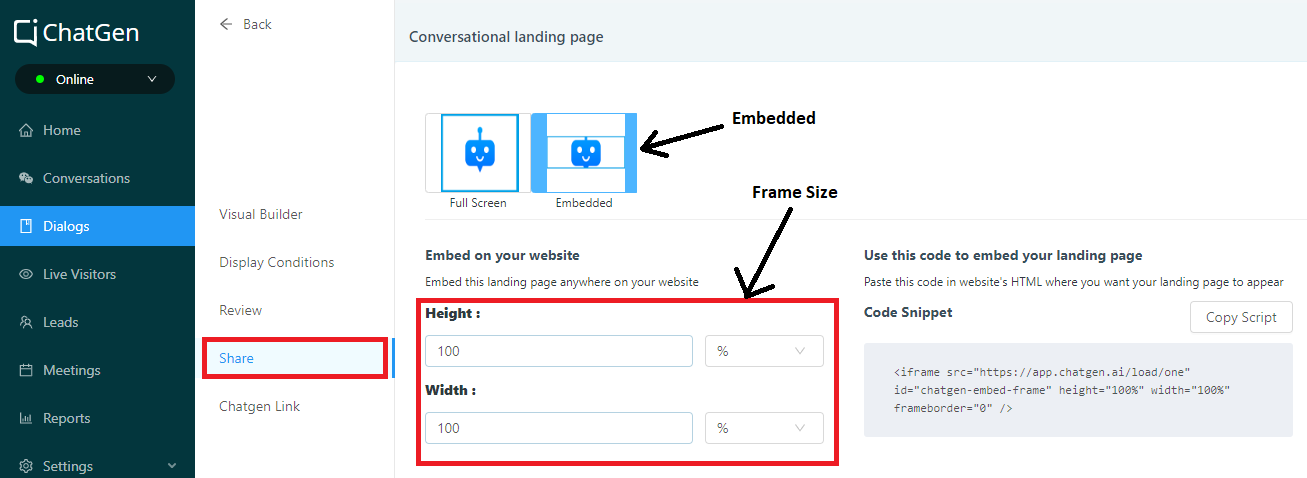
2. Click on share, where you’ll find two options:
– Full Screen (CLP)
– Embedded
3. Click on Embedded and provide the height and width which you want your bot to be. This can be provided in percentages as well as pixels.
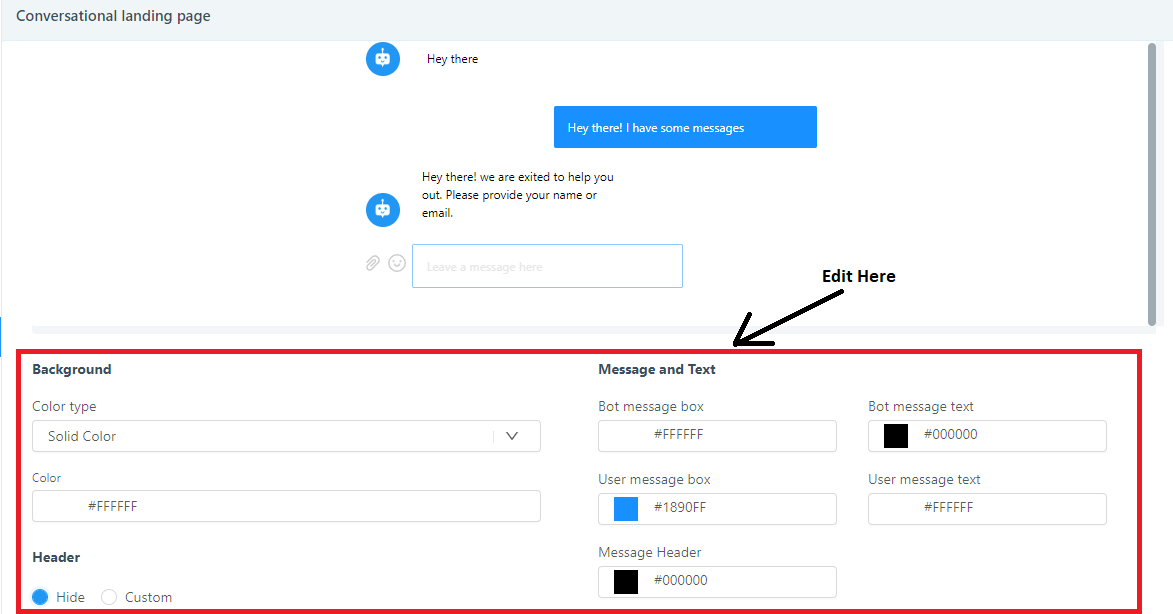
4. Scroll down to the bottom where you can edit the styling like the color of the background, color of the response messages, etc.
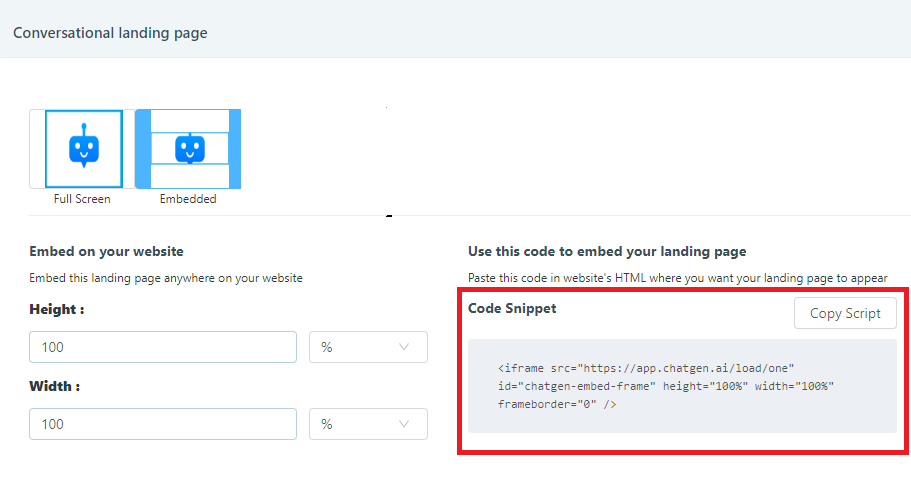
5. Once you have completed the above steps, all you have to do is copy the code snippet by clicking on ”˜Copy Script’ which is there on the right side of the share page, and paste it inside the <body> tags of your html/php page.
B. Using GTM (Google Tag Manager) to install
Lots of companies nowadays heavily use Google Tag Manager to track the details of web snippets. ChatGen code can also be installed using GTM. With a few simple steps you’ll be able to start tracking. Have a look at our blog or ”˜click here’ for more details.
C. Integrate GA
The Analytic service offered by google provides website analytics such as the number of visitors, the source from where they are being generated, details of the promotion campaigns, etc.
To integrate ChatGen to your Google Analytics all you have to do is copy the tracking ID and paste it in ChatGen.
Once you’ve copied the Tracking ID of the website that is to be integrated, login to your ChatGen account and follow the steps as given below-
Step 1: In the ChatGen dashboard, click on ”˜Integrations’ under settings.
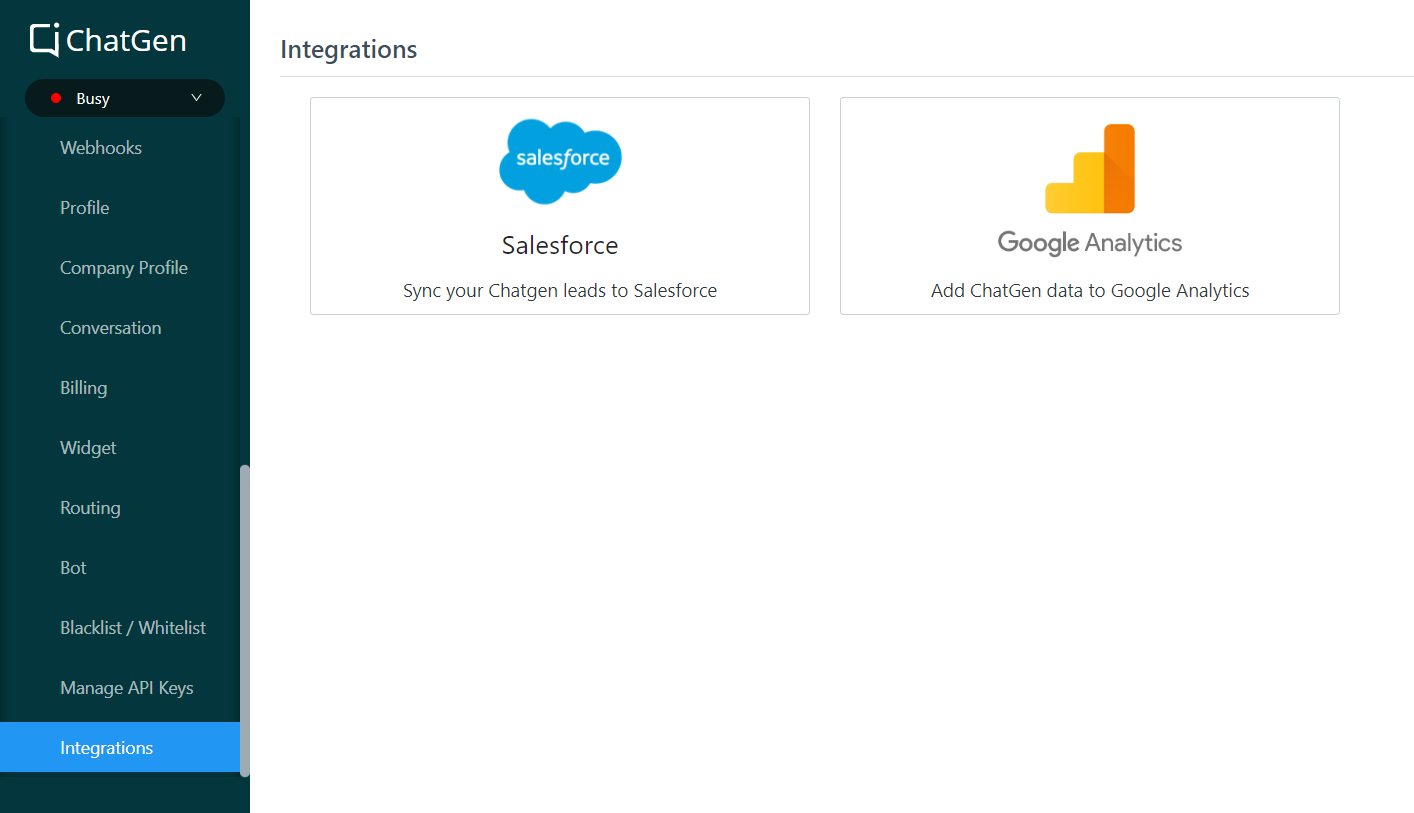
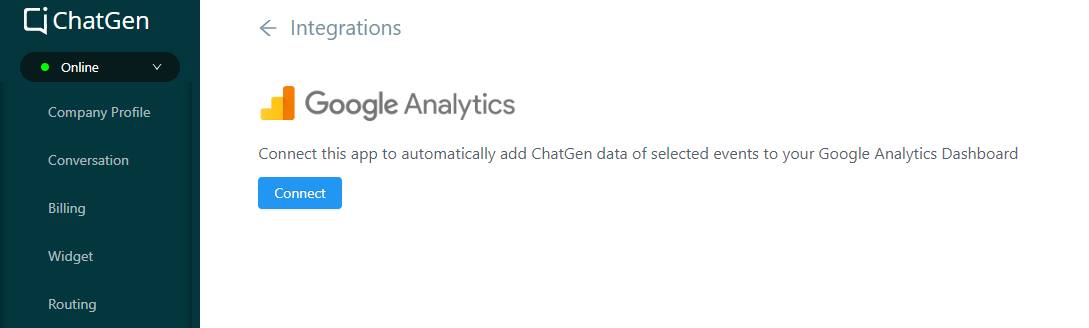
Step 2: Select Google Analytics from the options and click on ”˜Connect’.
Step 3: There you’ll find an option to post your tracking ID. Paste it there and click on save.
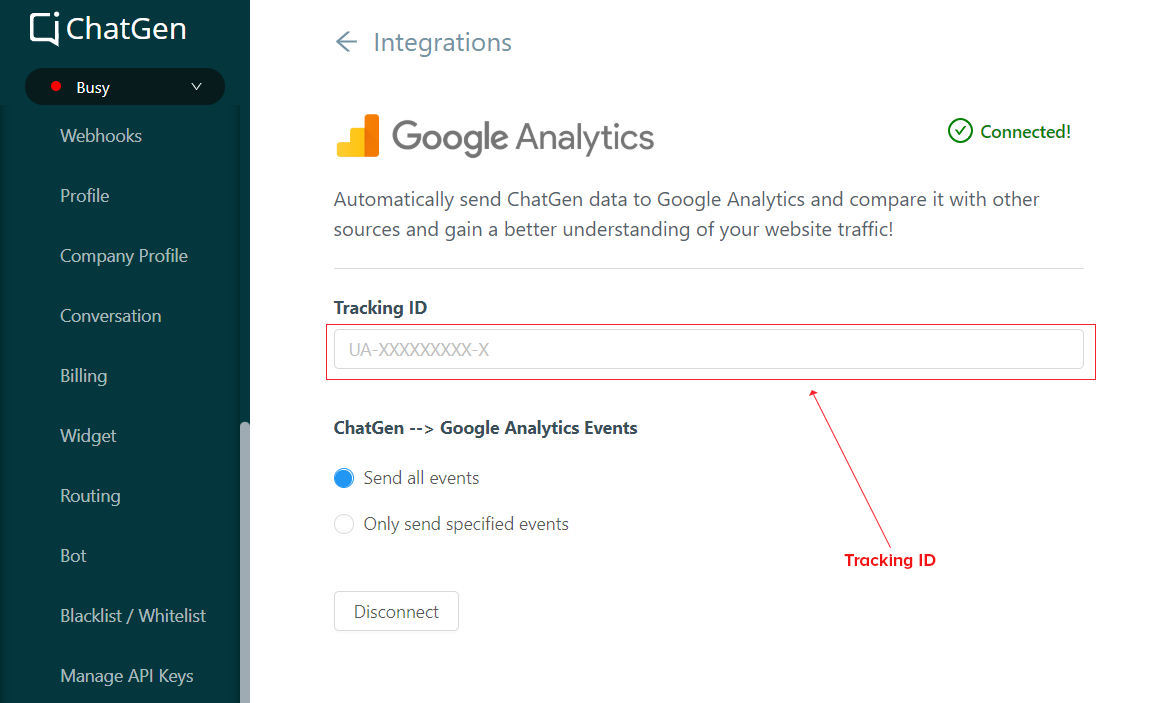
The integration is complete. Now all your details will be sent to Google Analytics and you can find the details in your GA dashboard.
D. Measure your flows
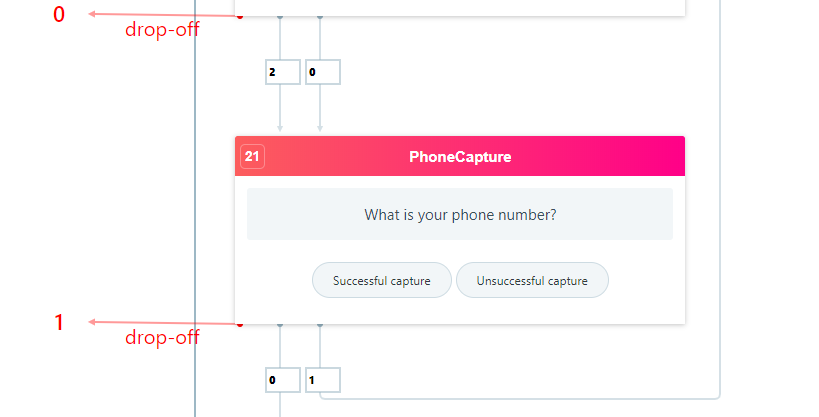
ChatGen collects all the data from each of your nodes to give you a detailed view on how your flow is performing. If a visitor starts chatting with the bot and it does not complete the flow then the visitor will be called a drop-off. ChatGen provides you with information like how many people have gone through a particular node while chatting and how many have dropped off. This allows us to understand how the flow is working and where the changes need to be made for the bot to capture more and more leads.
An in-depth knowledge about how this can be used further for your advantage can be found in this ”˜Testing your bot workflows with ChatGen’ blog.
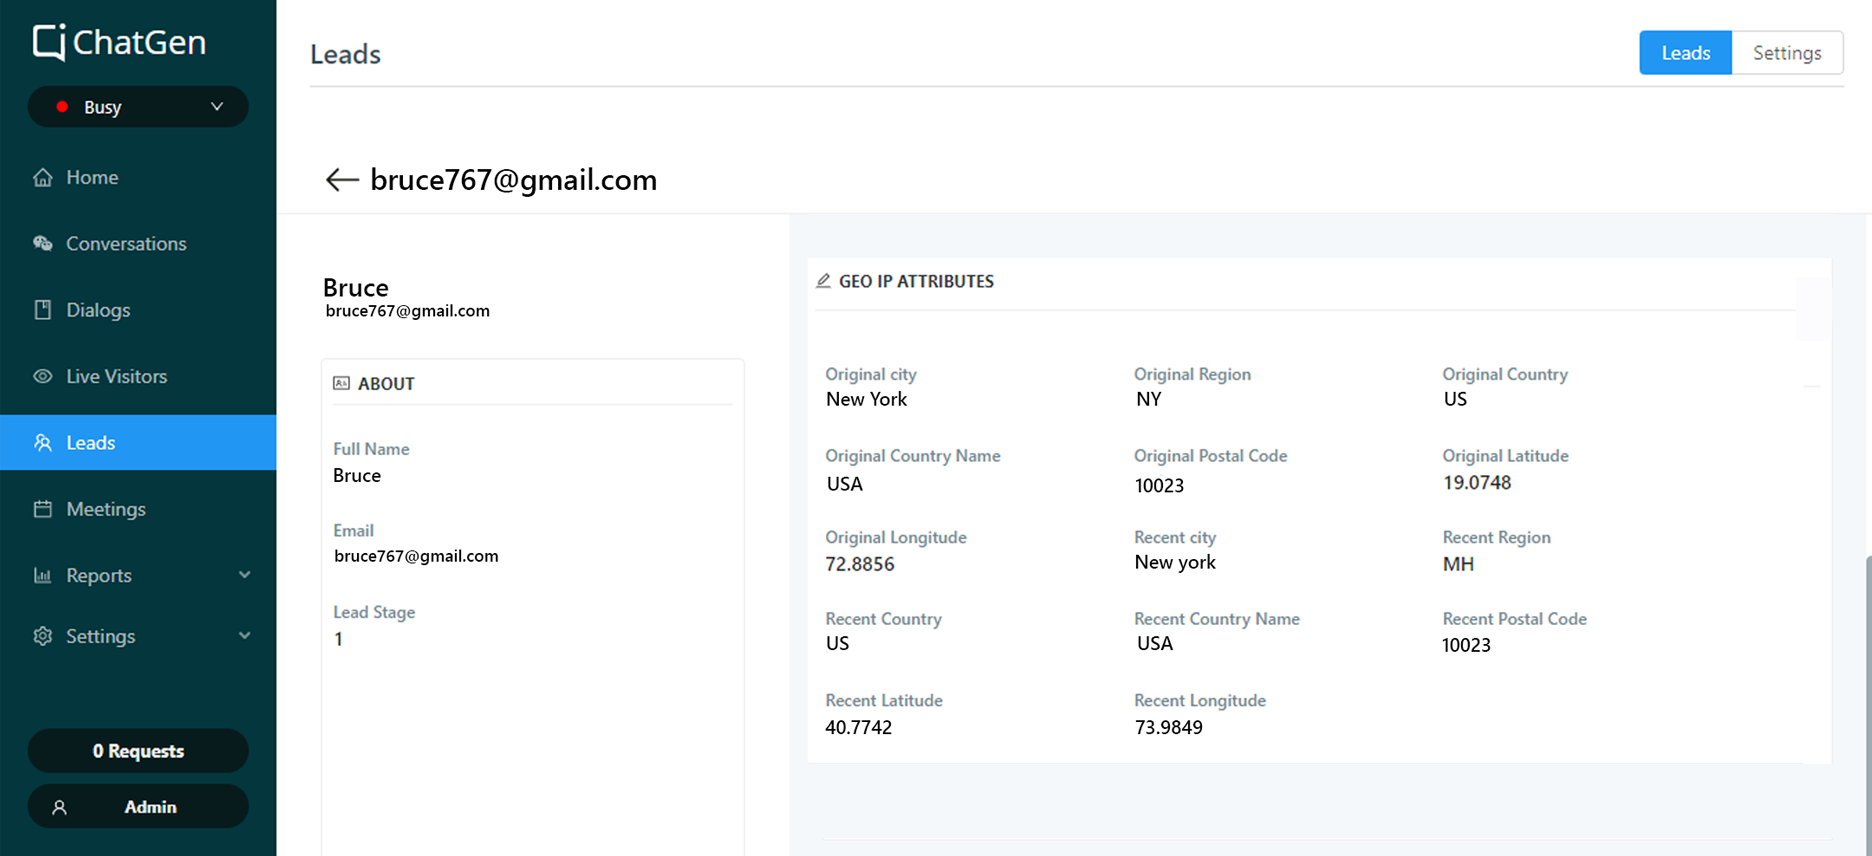
E. Leads & UTM parameters
A lead is someone who has provided their email ID and ChatGen dashboard provides all the important details like how many conversations have happened, number of leads collected, meetings booked, etc. This analysis gives you a detailed idea about on how the bot is performing.
UTM parameters
When a lead is collected, along with it, lots of other information such as Custom attributes, Geo attributes, etc. are also collected. It provides information like the geographic location of the user. Along with these, it’s possible to create custom attributes and provide it in the flow, where once the user enters the appropriate data, it is collected and stored in the respective custom attribute which will be visible to you from your dashboard. The below image provides a visual description of how the UTM parameters would look.